The Sophos UTM is way more than just a virtual router appliance. It is a swiss-knife with so many useful features. I have been using Sophos UTM for about 3 years. Two of them I used UTM in a production environment and it proved to be a very solid and reliable networking solution.
The good thing about Sophos UTM that makes it an ideal candidate for home networking is that you can get a free Home Edition license with plenty of features. You can grab your copy here.
Today I will be showing how easy and quick it is to configure remote access to your homelab with Sophos UTM.
The virtual appliance offers you a plenty of Remote VPN options:
- SSL
- PPTP
- L2TP over IPsec
- IPsec
- HTML5 VPN
- Cisco VPN
I generally prefer to use SSL and HTML5 VPN.
The former provides the best performance and is very secure, but it requires a client to be installed on your computer. The most popular OpenVPN SSL client for Mac is Tunnelblick. It never let me down.
The latter is HTML5 VPN. I normally use it as a backup method of remote access into my home lab when I can't use my Mac, e.g. in a customer's office. It doesn't require a client and runs just fine in your favourite browser. However, as you might have already guessed, it is not fast. Also, there are very few protocols that can be used via HTML5 VPN portal. With all that said it is still an awesome client-less remote access option.
So, let's have a look at how you configure SSL and HTML5 VPN on Sophos and how to configure Tunnelblick SSL client on your Mac.
Here is a simplified diagram of my home lab network topology

We will start with HTML5 VPN configuration.
1. Go to the Remote Access options and Enable HTML5 VPN Portal

2. Click the New HTML5 VPN Portal Connection button and configure the following settings:
- Name of the Portal
- Connection Type - choose your protocol
- The host you want to access via the HTML5 VPN
- The users allowed to log into this remote access.

I usually go with RDP and my Jump Host.
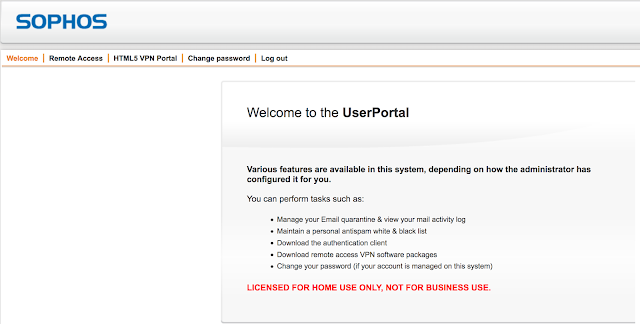
3. Now go to Management - User Portal configuration:
- Enable the End User portal
- Configure the Allowed Networks or Hosts that will be able to access the Portal web page.

Since I usually don't know what my remote IP Address will be (unless I work in the office) I prefer to rely on Dynamic DNS. I have been using noip.com as a dynamic DNS solution and I have no reasons to complain about them.
4. The last step would be configuring port forwarding on your Internet modem/router so that you could access the Sophos UTM on the Internet. That's how it looks on my NetComm modem.

Check your modem's documentation on how to configure PAT/NAT.
Tip: If your modem often renews public IP Address you could use Dynamic DNS as well.
Now you are all set and ready to go, so let's see how it works
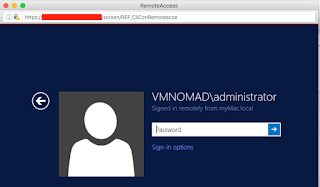
1. Open your browser and enter the public IP Address of your modem or Dynamic DNS name.
2. Enter the credentials

3. Click HTML5 VPN Portal button
4. That's where you can see the JumpHost you configured in Step 2.

5. Press Connect button and Enjoy clientless RDP access via HTML5.
Now let's go through the configuration of Remote Access via SSL
1. Enable the End User Portal.
We already did it in the step 3 of the HTML5 VPN Remote Access configuration procedure.
2. Go to Remote Access - SSL

4. That's where you can see the JumpHost you configured in Step 2.

5. Press Connect button and Enjoy clientless RDP access via HTML5.

Now let's go through the configuration of Remote Access via SSL
1. Enable the End User Portal.
We already did it in the step 3 of the HTML5 VPN Remote Access configuration procedure.
2. Go to Remote Access - SSL

3. Press New Remote Access Profile button and configure the following settings
- Name of the Profile
- Users allowed to use SSL Remote Access
- Networks that will be available when SSL VPN is established.
- Make sure the Automatic Firewall Rules checkbox is ticked.

4. Go to Advanced Setting and enter your Dynamic DNS record into the Override Hostname field. Alternatively, if you use static Public IP address you can enter it here.

5. Again, configure Port Forwarding to the External Interface of the Sophos UTM on your home modem/router.
That's it. The configuration of Remote Access SSL is complete on the Sophos UTM.
Now let's see how we configure the OpenVPN SSL client on your Mac or Windows.
1. Download and install Tunnelblick
2. Go to your browser and enter the public IP Address of your modem or Dynamic DNS name.
3. Enter your credentials
4. Open Remote Access tab

5. For Windows the installation is very straightforward. Download and install the VPN client. That's it.
6. For Mac you will need to download the ZIP file that contains all configuration files for the Tunnelblick
7. That's what you will see inside the zip archive
7. That's what you will see inside the zip archive

8. Right-click the .ovpn file and open it with Tunnelblick


9. After the new .ovpn profile is installed you can initiate a VPN tunnel from the Tunnelblick

9. Enter admin credentials

10. Confirm the Tunnelblick is connected

11. Ping anything on the home lab network from your computer to confirm everything is working fine


As you can see it doesn't take more than 5-10 minutes to setup 2 different types of Remote Access and no deep knowledge of networking or VPN is required. It just works.
No comments:
Post a Comment